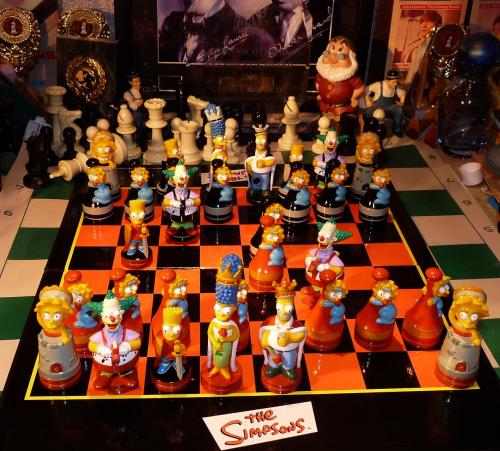
Picked up one of these for £2.00 at a Charity Shop.
A Simpson Chess Set, it’s hideous, I hate novelty chess sets.
I’ll wrap it up and give it to my son-in-law for Christmas.
He hates Chess and he hates the Simpsons.
(he hates the Simpson’s because he looks like and gets called Ned Flanders.)

There is no way anyone could cover all the intricacies of Rook Endings in a weekend blog.
All I can do is drop you tit-bits to whet you appetite. The rest is up to you.
There are some excellent books on the endgame out there that will reap more
benefits and points than 100 books on the opening.
I'm still reading this:
Which lit a fire in me regarding endings, especially Rook Endings.
It does however require you to know the basics.
I went through (skimmed is a better word for me) Keres Practical Endgames.
It served as a good foundation but the gaps in my endgame play are my fault.
I decided along time ago to fight my battles in the opening and middle game
and only go into an ending if it was a clear win.
When a dreaded Rook endgame appears it really is a different game.
I envy those can go into a Rook ending full of confidence and only now I can
appreciate the effort these guys must have put in.
Having said that….
(For God’s sake greenpawn cut the prattle and show us something………….Russ).
invigorate - passo RHP 2011
White can win this quite easily.
[FEN "8/k7/P4R1P/7r/8/1K6/8/8 w - - 0 1"]
1. Kc4 {White brings his King across to the Kingside and nurses home the h-pawn.} 1... Ka8 {Black keeps his Rook on h5 for as long as possible. Once the White King crosses the 5th rank the win is even more straightforward.} 2. Kd4 Ka7 3. Ke4 Ka8 4. Kf4 Ka7 5. Kg4 Rh1 6. Kg5 Rg1+ 7. Kh5 Rh1+ 8. Kg6 Rg1+ 9. Kf7 Rh1 10. Kg7 Rg1+ 11. Rg6 {The h-pawn has a clear run home, Black tries rank checks to prevent it.} 11... Rc1 12. h7 Rc7+ 13. Kh6 Rc8 {14 Rg8 will win but this move...} 14. Rf6 {...is the exact wrap up.} 14... Rd8 15. Kg7 Rd7+ 16. Rf7 {The pawn promotes.}
So why did I show this elementary win.? Because it is not what happened,
Black set White a ‘rule of thumb’ trap and White fell for it.
And I invented my own wee trap in the analysis!.
(well not really, the trap is probably 500 years old but I spotted it coming without
any prompting. Once I start spotting these traps a long way off I know I’m getting better.)
This is what happened in the invigorate - passo.
[FEN "8/k7/P4R1P/7r/8/1K6/8/8 w - - 0 1"]
1. Kb4 {As seen above 1.Kc4 is the winning method, however no real harm done, that comes on White’s next move.} 1... Rg5 {A tempting trick The foundation of which is trusting your opponent knows the rule of thumb. ‘Passed Pawns Must be Pushed.’ White should have carried on with the King walk as in the previous example but he jumped at the chance to push the pawn. } 2. h7 Rh5 {White now realises he has to shed a pawn. Keeping the a-pawn is a dead draw. so...} 3. Rf7+ Kxa6 {But the Black King can now assist it's Rook in stopping the h-pawn.} 4. Kc4 Kb6 5. Kd4 Kc6 6. Ke4 Kd6 7. Kf4 Ke6 8. Ra7 Kf6 9. Kg4 Rh1 {This is a draw. The Black King and Rook pick up the h-pawn. Though in the game the players played on and on and on (131 moves) before agreeing a draw.}
The wee Sneaky Pete I mentioned in the above game.
[FEN "8/5R1P/1k6/7r/2K5/8/8/8 w - - 0 1"]
1. Kd4 Kc6 {Now instead of 2.Ke4 which as we saw in the above example only drew. White can be Mr Crafty and play...} 2. Ra7 {The trap being...} 2... Kd6 {Black should play 2...Kb6 hitting the Rook. Now after 2...Kd6 he is lost.} 3. Ra6+ Ke7 4. Ra8 Rxh7 {Forced.} 5. Ra7+ {The instructive point being theses endings are laced with hemlock. There are cups of the stuff all over the board.}
The Kings facing each other pattern that appeared in the above game fragment.
Is worth storing, especially if you can see it coming 8 or 9 moves ahead.
This pattern forms the blocks of a lot of Rook Ending traps and pitfalls.
I work beside a chess player. Findlay Murray.
He is actually a RHP member (but I won’t reveal his nik)
He recently played in the Scottish National League and gave me
a couple of his games to look at. One fits this blog’s current theme perfectly.
F. Murray - C. Mcintee. SNCL 2013 (White to play)
Look at the position for a while so all the wee point seep in.
Note the Black King cannot stroll onto the g-file because of Rg8+ and a8=Q.
White won this by moving his King towards the Rook and playing g4.
This opened up the Kingside and with no pawns to hide behind the threat
of White giving a check and promoting on a8 forced Black’s resignation.
Is there another winning method, a slick winning method?
How about moving the White King to h2 and then playing Ra8-g8 threatening a8=Q.
When the Black Rook takes on a7 (which is forced) White can play g3 checkmate.
I like nifty swift click finishes, it proves you are alert.
Further examples of how these blogs are put together.
I recalled the bones of this position from an old puzzle book.
I dug it out and put on the unremembered flesh. (names, date and exact position).
Bukic - Marovic, Yugoslavia 1968 (White to play and win.)
A nice simple thinker to get your brain cells warmed up. (solution below).
So off into the RHP DB looking for two split pawns on the 7th rank
to see if anyone on here has played something similar.
It’s a trick I often use to unearth games.
Find a known combination played by GM’s, look for a corresponding pattern
and see how you guys have managed to screw it up. 🙂
Using this method I’ve uncovered some brilliant masterpieces of ingenuity.
Ingenious in the fact that it often looks harder to lose from a position than it is to win it.
You guys find some truly awesome ways to lose a game of chess.
I found hundreds of White wins with split pawns on the seventh.
But sticking out like a black eye on the face of a choir boy was this ‘0-1’
“Most likely a time-out.” I thought to myself. But I looked anyway.
jaluh - HiChief RHP 2011
Position after Black’s 35th move Rh8-c8.
White lost this. So be warned, nothing in Chess is certain.
[FEN "q1r5/PQP2p2/5kp1/7p/3P4/8/5PPP/1R4K1 w - - 0 36"]
36. Qxa8 Rxa8 {Now before doing anything else, give the White King some air, open a window. (h3).} 37. Rb8 Rxa7 {And to his horror White now saw that c8=Q losses instantly to Ra1+} 38. h3 Rxc7 {Thanks to a weakness on another part of the board the two mighty seventh rank pawns have gone.} 39. Rb4 Kf5 40. Kf1 Rc2 {Black’s King and Rook are suddenly the most active bits on the board. Obviously disheartened at the turn of events White, although here still a pawn up, slipped in a few more errors and lost.}
The deviousness of White’s play here has to be applauded.
Ravello - kwast RHP.2005
[FEN "8/2R3pk/2pr4/1p4PK/8/8/8/8 w - - 0 36"]
36. Rc8 {White is inviting the b-pawn to sprint home, he will not be interested in it until it cannot be protected by the c-pawn.} 36... b4 {If White now attacks the pawn it can be protected by the c-pawn. So...} 37. Rc7 {What is White waiting for?} 37... b3 {That’s the move he was waiting for, now he can attack the b-pawn...} 38. Rb7 {This move encourages Black to play...} 38... Rd3 {Which is what White was really waiting for. Now White can show his hand.} 39. g6+ Kg8 40. Rb8+ Rd8 41. Rxd8
Top Hat - gbjames RHP 2008
This is a good game for the theme of this blog.
Pawn weakness’ inflicted on Black in the opening start to count in the ending.
The Rook ending hides a few instructive shots and we get a nice calculated finish.
1. e4 e5 2. f4 {The King's Gambit. This usually leads to a lively game.} 2... exf4 3. Nf3 d5 {4.exd5 is the choice move here. But....} 4. Nc3 {..at this level I've always found it difficult to argue against a developing move. It is what we drum into players.} 4... dxe4 5. Nxe4 Qe7 6. Qe2 Nc6 7. d3 Nf6 {But I can argue with this because there was a better piece developing move (7...Bg4 with Nd4 ideas). The drawback of the text becomes apparent in a few moves.} 8. Nxf6+ gxf6 9. Qxe7+ Bxe7 10. Bxf4 {A position you could easily see coming in your mind before playing 7...Nf6. There is enough in there for you to reject it. White has won back his gambit pawn, the double pawns are on an open file and can be easily attacked. The c7 pawn is getting hit, If it goes the d-pawn is passed and with the Queens off that matters.} 10... Bd6 {Black accepts four pawn islands to save the c-pawn.} 11. Bxd6 cxd6 12. O-O-O {Again I cannot argue with that, we tell them to castle ASAP. But here 12.Kd2 should have been considered. With the Queens off castling can often be shelved for a more active King.} 12... Bg4 13. Re1+ Kd7 14. Be2 Bxf3 {That's a baddie. An unforced exchange. The f3 Knight was going nowhere. 14...Rh8 was a try. If you have double pawns then cheer up, it means you have an open file for your Rook. Use it.} 15. Bxf3 Nb4 {Hmmm...This move be linked with the previous move, if so I take my last note back. (see next game sample).} 16. a3 Nc6 17. Bxc6+ {With all those pawn split and juicy targets White turns it into a Rooks only game.} 17... Kxc6 18. Re7 {Taking the seventh rank. Excellent.} 18... Rae8 19. Rxf7 Re2 {Equally excellent. Black decides he cannot play a passive game, too many targets to cover, so he goes active. Active play even at the cost of a pawn or two is often the best play in Rook endings.} 20. g3 Rhe8 21. Rxh7 Rf2 22. Rd1 {White attempts to swap off the f2 Rook with Rd2 but this is a waste of time. Or is it? As we shall see White is a crafty player and this move inviting....} 22... Ree2 {....may well have been part of White's plan because he has seen a cunning ploy (worth remembering) how to get rid of Double Rooks on the seventh rank.} 23. Kb1 Rxc2 {Black is threatening Blind Swine. Rc2-b2+ - a2+ - b2+ - c2+ A draw.} 24. Rc1 {But that's torn it.} 24... Rxc1+ 25. Kxc1 {Still some difficulties to overcome for White, his King is cut off. Black has an extra piece in play (his King) .} 25... a5 {Possibly with the idea of playing a4 to stop the White King sneaking off the back rank with Kb1-a2-b3.} 26. h4 {Passed pawns must be pushed.} 26... Rf3 {Black releases the White to King to win back his pawn and create his own passed pawn. Either the d-pawn or the f-pawn will fall.} 27. Rg7 {That looks correct. White elects to give Black a passed d-pawn. The White King is handily placed to handle that. Also the Black Rook has to dance around that g3 pawn to get behind the running h-pawn.} 27... Rxd3 28. h5 Re3 29. h6 Re1+ {See previous note. Black did not want to give this check but he needs the tempo. 29..Re2 allows White to play 30.Rf7 and the two passed connected g and h-pawns will walk home.} 30. Kd2 Rh1 31. h7 Kd5 {That's wrong. Black just gives up a pawn for nothing. He may have been worried about the White King chasing the f-pawn. Yes it's a future idea but no need to give up a precious endgame pawn.} 32. Rxb7 Rh2+ 33. Kc3 Rh3 34. b4 f5 {Black puts his faith in this f-pawn. White has a smashing idea up his sleeve.} 35. bxa5 f4 36. Rb5+ Kc6 37. a6 {Yes! It works. White has it all figured out. The a and h-pawns dominate the Rook. If Black declines the Rook, 37…Rxh7 38.Ra5 Ra7 (forced. Note the a-pawn promotes with a CHECK.) 39. gxf4 is a simple win.} 37... Kxb5 38. a7 Rxg3+ 39. Kd4 Rxa3 40. h8=Q {Black resigned a few moves later.}
I wanted to show this line from the above game.
[FEN "r6r/pp1k1p1p/2np1p2/8/6b1/3P1N2/PPP3PP/2K1RB1R w - - 0 1"]
1. Be2 Bxf3 {I was a wee bit harsh on this but perhaps this was the idea behind it. If it had a an idea behind it and was not just a move played because it was Black's move and he could not think of what to do, then it's OK. You must try out your ideas,} 2. Bxf3 Nb4 {Now White was meant to take the b7 pawn. In the game White played a3 and the bad idea was exposed.} 3. Bxb7 Rab8 4. Bf3 Nxa2+ {5.Kd2 drops the b2 pawn.} 5. Kb1 Nc3+ 6. Kc1 Na2+ 7. Kb1 Nc3+ 8. Kc1 Na2+ 9. Kb1 Nc3+ {That's a draw. What about Ka1.} 10. Ka1 Rb5 {11.b2 is the move here and Black is fighting on with 11..Rc8 . But let us take the Knight. We have to see the full idea.} 11. bxc3 Rhb8 {And Ra5 Checkmate follows.}
Solution to: Bukic - Marovic, Yugoslavia 1968
[FEN "3k4/P2P3p/3R2p1/6p1/8/6PP/r7/5K2 w - - 0 1"]
1. Rf6 {That's it. It's all based on a 7th rank skewer. The threat is the 8th rank skewer 2.a8=Q Rxa8 3.Rf8+.winning the a8 Rook.} 1... Kxd7 {If instead 1...Rxa7 2.Rf8+ Kxd7 3.Rf7+ winning the Black Rook on a7.} 2. Rf8 Rxa7 3. Rf7+ {And White picks up the Rook.}
OK. Own up. How many did I catch with the F. Murray - C. Mcintee game and the 'nifty swift click finish’
[FEN "R7/P7/8/7p/7k/7P/r5P1/3K4 w - - 0 1"]
1. Ke1 Ra1+ 2. Kf2 Ra2+ 3. Kg1 Ra1+ 4. Kh2 Ra2 {If White goes for the 'nifty swift click finish’ with as I suggested...(adding the clue - it proves you are alert.} 5. Rg8 {Black does not take the a-pawn to be mated by g3. Instead he plays...} 5... Rxg2+ {CHECK! and Rxg2 or Kxg2 is Stalemate.}
I showed the original position and the idea to Murray.
He agreed it was good, so I suggested we play it out. I took Black.
And just before he played 5.Rg8 he spotted the Stalemate Trick. Good.
(That's what happens if you hang around me for too long...You Check All Checks.)
The thread accompanying this blog is Thread 156720


Granpa Simpson Endings.