 - Carlsen Wins")

Hello again and first some pictures from our man in New York,
HikaruShindo who has been very snap happy sending us pictures.
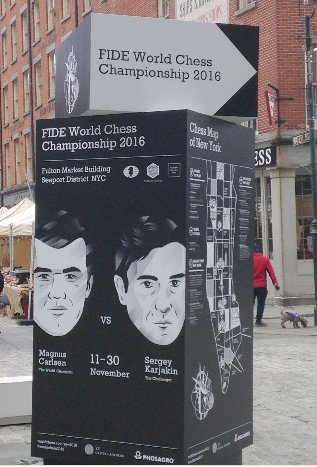
A street billboard giving your directions to the match.
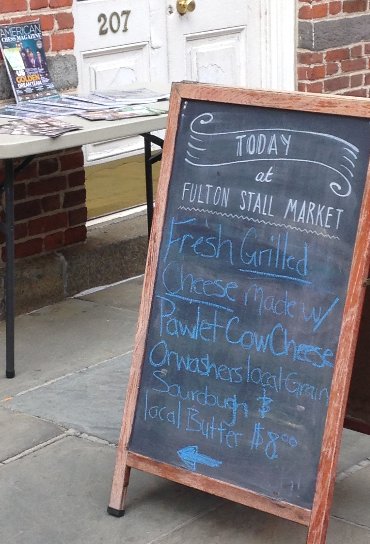
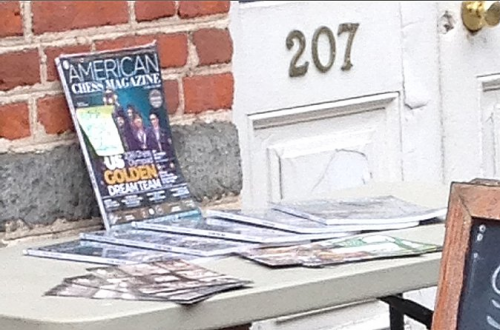
The menu at the Fulton Market, but what is that on the table>
It's a pile of Chess Magazines.
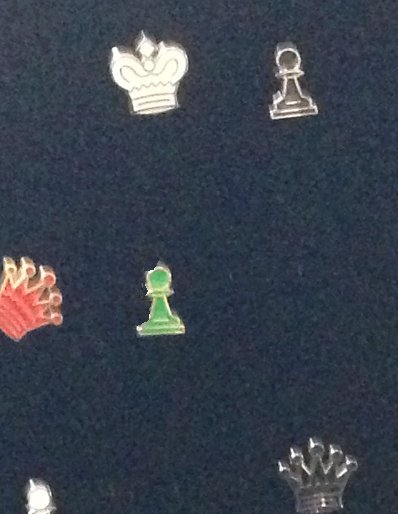
A collection of pin badges for sale.
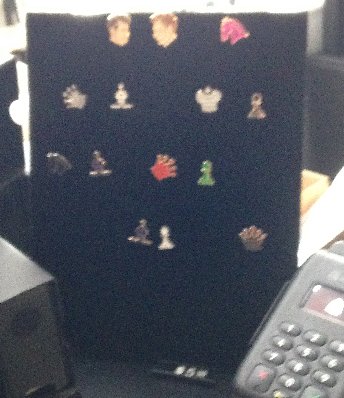
And look...I want one HikaruShindo, I want one.
Magnus Carlsen - Sergey Karjakin. 2016 World Championship Game 10.
Of course a grab hack and slash merchant like me should not be allowed
anywhere near a Carlsen or Karjakin game because I will not have a clue
what is going on....and in this game I don’t. But I seek solace in the fact
that neither does 99% of the rest of the planet. So here goes ..................
1. e4 e5 2. Nf3 Nc6 3. Bb5 Nf6 {Karjakin invites the opening the public fear. The Berlin. Why do we fear it? What we do not understand we fear. it is as simple as that.} 4. d3 Bc5 {Here against Wes So this year Carlsen played 5.Bxc6 and won in 26 moves. Team Karjakin obviously have an improvement.} 5. c3 {The other good choice in this position, centre building. Both players have been on both sides of this opening quite a few times but never against each other.} 5... O-O 6. Bg5 h6 7. Bh4 {Always advisable not to go for g5 in these positions when Black has Castled and White has not.} 7... Be7 {Carlsen as Black played this v Shirov in 2011.} 8. O-O {The most popular plan here is 8.Nbd2-f1 and Ng3 or Ne3 It's a plan I've often used in such set ups.} 8... d6 9. Nbd2 Nh5 {This is Karjakin's idea to swap dark squared Bishop and settle a Knight on f4.} 10. Bxe7 Qxe7 11. Nc4 {The Knight getting to e3 via this route.} 11... Nf4 12. Ne3 Qf6 {An aggressive attitude from Black. One would think with Carlsen being 1-0 down he would be the attacker.} 13. g3 {If this is meant to tempt Karjakin to over reach himself then it worked. (100% hindsight)} 13... Nh3+ 14. Kh1 Ne7 {This Knight is off to join his pal on the Kingside.} 15. Bc4 c6 16. Bb3 {Carlsen is going backwards....was this part of the plan. I think not.} 16... Ng6 17. Qe2 a5 {Good move preparing the next move. White cannot allow a5-a4.} 18. a4 Be6 {The b3 Bishop is unprotected. Karjakin wants the trade on e6....} 19. Bxe6 fxe6 {...to get the open f-file. This looks very good for Black.} 20. Nd2 {There are claims Karjakin has a perpetual with 20...Nxf2+ See Variation one.} 20... d5 {If Karjakin saw it then sensing Carlsen is playing badly he plays on..} 21. Qh5 {Black can take the f2 pawn here. 32...Nxf2+ 33.Kg1 Qg5 34.Qxg5 Nh3+ and Nxg5. Or 2...Nxf2+ 33.Kg2 Qf7! threatening Ng6-f4 +} 21... Ng5 {Karjakin retreats. it is possible he never saw none of these tricks on f2. Is this one them cases where you trust you opponent? } 22. h4 {22....Nf7 23.Ng4 is 1-0 as the g6 Knight is lost.} 22... Nf3 23. Nxf3 Qxf3+ 24. Qxf3 Rxf3 25. Kg2 Rf7 {Well that was fun. We now enter the Carlsen shuffling phrase He just keeps Karjakin guessing as to his intentions and Karjakin drifts in a poor position.} 26. Rfe1 h5 27. Nf1 {And if you think I can explain what Carlsen is up too then you must be mad! If I could I'd be sitting opposite him in New York.} 27... Kf8 28. Nd2 {But I shall persevere and see if I can spot any shots.} 28... Ke7 29. Re2 Kd6 30. Nf3 Raf8 31. Ng5 Re7 32. Rae1 Rfe8 {Black's been forced passive. A surprising turn after the opening. Carlsen now shuffles about looking for weakness and where he will break through.} 33. Nf3 {'shuffling about' is way beyond me. There are possibly very deep reasons for Carlsen's choices and I cannot see them. So till then...shuffling about it is.} 33... Nh8 34. d4 exd4 35. Nxd4 g6 {Is that OK. Carlsen’s wee beady eyes would have eyed the square f6 for a future date. My rule of thumb when passive is to leave your pawns alone.} 36. Re3 Nf7 37. e5+ {That is a decision. The centre is blocked and f5 is a square for the Knight but you have to give squares to get squares - Bobby Fischer.} 37... Kd7 38. Rf3 Nh6 39. Rf6 {What did I tell you.! a Rook goes to f6. It's just a fishing expedition before the main breakthrough.} 39... Rg7 {Carlsen loves tying down pieces defending pawns and squares. His gift is exploiting these positions.} 40. b4 {Another decision from Carlsen, the action switches to the Queenside. The fact this move gives Black a passed pawn seems not to bother Carlsen.} 40... axb4 41. cxb4 {White has the makings of an outside passed pawn.} 41... Ng8 42. Rf3 Nh6 43. a5 Nf5 44. Nb3 {Of course Carlsen keeps the Knights on. There are more holes in Black's position than there are in Whites.} 44... Kc7 45. Nc5 Kb8 46. Rb1 {Next phase. Carlsen is going play b4-b5 but only when he is ready. More shuffling about coming up.} 46... Ka7 47. Rd3 Rc7 48. Ra3 Nd4 49. Rd1 {49...Nb5 to stop the eventual b5 allows Rf3, from there to f6 then Knight d3 to f4 hitting the e6 and g6 pawns.} 49... Nf5 50. Kh3 {Typical Carlsen. Black has to watch out for White playing f3 and g4. He is not planning that, but Black has to be ready for it.} 50... Nh6 51. f3 {A small concession granted to Karjakin. to keep the Knight off g4 Black has a target on f3.} 51... Rf7 52. Rd4 Nf5 53. Rd2 Rh7 {Karjakin has a defensive plan. Double Rooks on his 2nd rank and see what Carlsen intends.} 54. Rb3 Ree7 55. Rdd3 Rh8 56. Rb1 Rhh7 {Now Carlsen is ready for b5.} 57. b5 cxb5 58. Rxb5 {b7 is getting hit. The Rook will go to b6 and hit d6 The c5 Knight is hitting both targets. Something has to give.} 58... d4 {Karjakin goes for counterplay to distract Carlsen . He has to else Carlsen will tie him down defending and material will fall without any compensation.} 59. Rb6 Rc7 60. Nxe6 Rc3 {61.Rxc3 would solve all Karjakin’s problems. 61...dxc3 62.Rb3 Re7 the position is level.} 61. Nf4 Rhc7 {This enters a forcing line which gets rid of a pair of Rooks. It looks for a moment Black will get enough activity to cause problems but it just fails.} 62. Nd5 Rxd3 63. Nxc7 Kb8 64. Nb5 {The threat is a6} 64... Kc8 65. Rxg6 Rxf3 {After that sequence White is a pawn up.} 66. Kg2 Rb3 {Another forced sequence of moves coming up.} 67. Nd6+ Nxd6 68. Rxd6 Re3 69. e6 Kc7 70. Rxd4 Rxe6 71. Rd5 Rh6 {Once you have a Rook tied down defending a pawn in Rook endings you are well on the way to a win. (Of course the extra pawn helps.)} 72. Kf3 Kb8 {Not sure about that one, very possible time trouble but the Rook ending is lost.. White shows one method.} 73. Kf4 Ka7 74. Kg5 Rh8 75. Kf6 {The King is going to g7 and the h-pawn falls. Karjakin resigned.}
Variation One The Perpetual
| FEN | r4rk1/1p4p1/2pppqnp/p3p3/P3P3/2PPNNPn/1P2QP1P/R4R1K w - - 0 20 |
[FEN "r4rk1/1p4p1/2pppqnp/p3p3/P3P3/2PPNNPn/1P2QP1P/R4R1K w - - 0 20"]
20. Nd2 Nxf2+ 21. Kg1 Nh3+ 22. Kh1 Nf2+ 23. Kg1 {That is one perpetual, If White tries to avoid it.} 23... Nh3+ 24. Kg2 Ngf4+ 25. gxf4 Nxf4+ 26. Rxf4 exf4 27. Nec4 {That is messy. and very hard to evaluate 6 moves away. a Rook for two Knights. Black is better. Maybe Karjakin wanted more. Who Knows?}
 Liljo
Liljo