Hello everyone, and welcome to the only chess blog on the internet that speaks to clients on the phone about quantities and type of copier paper. As I mentioned several posts ago, I’ve been re-watching episodes of The Office, set in Pennsylvania, and there’s a scene where one of the main characters (Jim, played by John Krasinski) plays a game against one of the other office workers.
To make a long story short, if you google: (“wilkes-barre” “krasinski” “chess” ) the first result is the following delightful little minature:
Krasinski–Yakov Estrin Istra 1947
1. e4 e5 2. f4 d5 {Estrin, as usual, seeks to control the game, and countergambits a pawn.} 3. exd5 e4 4. d3 Nf6 {If 5. dxe4 now, Nxe4 is uncomfortable for white: Qh4 is an immediate threat, and the knight is positioned well.} 5. Nd2 Bf5 6. Qe2 Bb4 {Seeing no way to protect the pawn other than the awkward Qe7, Estrin defends indirectly by pinning an attacker.} 7. c3 0-0 {Black now sees an opportunity to exploit the e4 pawn and White’s awkward development, sacrificing a piece to bring more attacking power to bear on the e-file.} 8. cxb4 exd3 9. Qd1 Re8+ 10. Kf2 Qe7 {Ng4 was an option, but this forces White to move the knight to defend e3.} 11. Nc4 Ne4+ {0-1. At the minimum, Black has a discovered check and can win the queen. If White prevents it with 12. Kf3 instead, Bg4+ 13. Kg4 Nf2+ is just as good.}
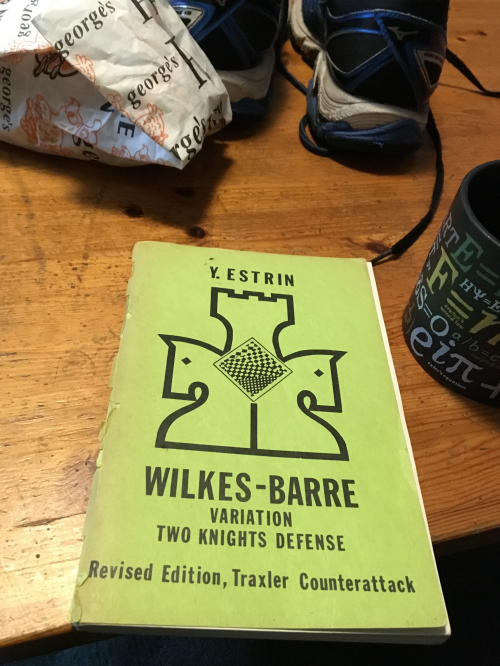
While we’re talking Estrin, I should show you my copy of his Traxler addendum that I keep forgetting to give back to my friend. (Not returning chess books seems to be an unfortunate theme of this blog, but so be it.) Here it is:
At least for the Wilkes-Barre variation it’s a fantastic book, and I recommend reading it if possible– with a chessboard out, preferably, and not a computer screen, though I do recognize the hypocrisy of that idea when you’re reading these words through one.
One of my favorite games Estrin is his contest against Hans Berliner, who employed Estrin’s favored Two Knights Defence. (I will never understand why, having been paired against Yakov Estrin, you would try to beat him at his own game. Then again, it was the year before England, of all countries, won the world cup, so maybe the game was an omen of strange things to come.)
Yakov Estrin–Hans Berliner CC World Championship 1965
1.e4 e5 2.Nf3 Nc6 3.Bc4 Nf6 4.Ng5 d5 {Berliner opts for a usual Two Knights, skirting Estrin’s Traxler.} 5.exd5 b5 {However, Hans offers another pawn instead of the more usual 5…Na5.} 6.Bf1 {After 6. Bxb5 Qxd5 7. Nc3 Qc5 8. Bxb5, Black’s central control is enough to make up for the pawn, especially as the bishop and knight can be kicked around. Be2 is fine as well, but does lend more weight to Nd4 unnecessarily.} Nd4 7.c3 Nxd5 {If 8. cxd4, Qxg5 9. Bxb5+ Kd8, then White is in a deceptive amount of trouble. for example, after 10. 0-0 Bb7, three pieces are already trained on the White kingside.} 8.Ne4 {White has a few alternatives, such as h4, but Ne4 concedes the fewest weaknesses.} Qh4 {Black exposes the queen to attack, but, impossibly, White has no productive way of repulsing it, and White’s lack of development means Black isn’t behind. In fact, Black has now developed three pieces to White’s one.} 9.Ng3 {The only other move was 9. d3, but Bg4 forces 10. Bg5 Qxg5 11. Ng5 Bxd1 12. Kxd1, after which White even; hardly the desired outcome in a championship match, when every game with White is crucial.} Bg4 10.f3 {Forced. If 10. Be2 Nxe2 11. Nxe2 Nf4, and White is lost.} e4 {Instead of letting White off with one option, Berliner forces Estrin to make a decision: often the hardest part of defending.} 11.cxd4 {However, White makes the right choice: after 11. fxg4 Bd6 12. Qe2 isn’t an option, forcing Estrin to bring his king out into the open with 12. Kf2.} Bd6 12.Bxb5+ {This move appears to be a useful interposition, allowing a kingside castle, but the king isn’t much safer.} Kd8 13.0-0 exf3 {14. gxf3 Bxg3 loses for White, so Black recoups his material.} 14.Rxf3 Rb8 15.Be2 {15. Bf1 is a little better as it allows for 16. Qxf3, leaving the knight recapturable without doubling pawns and weakening the kingside.} Bxf3 16.Bxf3 Qxd4+ 17.Kh1 Bxg3 18.hxg3 Rb6 {Berliner, with the kingside weakened, looks to bring more pieces into the attack.} 19.d3 {Necessary, to prevent Rh6.} Ne3 {Black aims to disrupt the defence of Rh6.} 20.Bxe3 Qxe3 21.Bg4 {On Rh6, White can now interpose with 22. Bh3} h5 {With the threat of the first rook nullified, Black, now able to threaten White’s bishop in the process, sets about activating the second one.} 22.Bh3 g5 23.Nd2 {White sensibly salvages an exchange as compensation for the trapped bishop.} g4 {On most moves to prevent the coming fork, Qf3 or Qb3 can poke at the Black back rank, or the queen can be similarly tempted by the knight, after which the bishop can be saved via extradition to f5. Berliner finds it less trouble to simply restore material balance.} 24.Nc4 Qxg3 25.Nxb6 gxh3 26.Qf3 {The threats of queen checks and recovering the knight mean Black has no choice but to exchange.} hxg2+ 27.Qxg2 Qxg2+ 28.Kxg2 cxb6 29.Rf1 Ke7 30.Re1+ Kd6 31.Rf1 Rc8 {Black abandons the pawn, as otherwise either his rook or king would be tied down to its protection.} 32.Rxf7 Rc7 {Since Black has the outside passed pawn, and in any case White’s rook has a superior position, he figures this exchange is beneficial.} 33.Rf2 Ke5 34.a4 {34. Kg3 makes more sense to me, as it activates the king and approaches the d-pawn. a4-a5 is obviously Estrin’s plan, but it appears ineffective; Black can merely refuse to take the pawn.} Kd4 35.a5 Kxd3 36.Rf3+ Kc2 {By ignoring White’s plan, Black has improved the position of his own king and recovered a pawn– the end failure of Estrin’s idea is why I’m skeptical of it in the first place, as there doesn’t seem to be a way it could have worked better.} 37.b4 b5 38.a6 {38. Rf5, recovering a pawn, appears more natural to me; Why weaken the a-pawn of Estrin’s own volition?} Rc4 39.Rf7 Rxb4 40.Rb7 {40. Rxa7 steals back a pawn and maintains some counterplay; White takes it back later anyway, so why waste the time?} Rg4+ 41.Kf3 b4 42.Rxa7 b3 {0-1.}
Here’s a video that goes a little further in depth on the same game, made by the excellent kingscrusher.
When I was researching this blog, I decided to see if I had any similar Traxler games. Turns out, I won a Traxler tournament on RHP way back in 2015. Several of these games weren’t the best, but there was one I thought might be helpful to look at more closely, as it showcases how knife-edged the opening can be.
HikaruShindo–Kunsoo RHP 2015
[SetUp "1"]
[FEN "r1bqk2r/pppp1ppp/2n2n2/2b1p1N1/2B1P3/8/PPPP1PPP/RNBQK2R w KQkq - 0 1"]
1. Bc4xf7 Ke8e7 {The best response, as it leaves f8 free for the rook.} 2. Bf7b3 {It’s also best to withdraw the bishop straightaway– once the rook takes up its position, it will be threatened, and it can't do anything on f7.} Rh8f8 3. Nb1c3 Bc5xf2 {This sacrifice seems ultimately unfounded– it wins a pawn but ultimately leaves the Black king more exposed than its White counterpart, with the kingside knight removed.} 4. Ke1xf2 Nf6xe4 5. Kf2g1 Ne4xg5 6. d4 {This move opens up the center of the board, freeing White up to attack the king while winning a tempo by hitting the Black knight.} Ng5f7 7. Bb3xf7 {This is my first mistake, and with the benefit of hindsight it’s transparent that exchanging the dominant bishop for the misplaced knight makes little sense.} Ke7xf7 {Forced as otherwise 8.Bg5 wins the queen.} 8. Qd1h5 Kf7g8 {This is the sequence I had anticipated, but I’ve instead chased the king to it’s natural position, losing the main advantage I had.} 9. Bc1g5 Qd8e8 {Rf5 was another option, pinning the bishop.} 10. Qh5h4 {I avoid the queen trade, but at the cost of another pawn.} Nc6xd4 11. h3 {Frees up the knight, which had been guarding e2.} d6 12. Nc3d5 Rf8f7 {Defending c7.} 13. c3 Nd4e6 {Unfortunately, the knight is kicked back to a space where it's similarly comfortable.} 14. Bg5e3 {This move preserves the bishop, but forces the knight to an unsuited square. Bd2 is no better, so why not let the bishop be traded and bring out a rook instead?} c6 15. Nd5b4 Ne6f4 16. Ra1f1 Nf4e2 17. Kg1h2 Qe8f8 {Be6 or a similar move is better– both sides are re-moving their pieces unnecessarily, while neglecting their undeveloped pieces.} 18. Rf1xf7 Qf8xf7 19. g3 {I believe the logic behind this move was to play Kg2-Rf1 as a method of activating the rook. However, it’s terrible looking back, as there’s no reason to, unprompted, weaken the kingside by so much.} a5 {There’s no reason to kick the knight back to a better position– Be6 first is clearly superior.} 20. Nb4d3 Bc8e6 21. Rh1e1 {Control of the f-file is more important, as the knight can’t be immediately removed. there aren't many better moves– Kg2, for example, walks right into Bd5+, so Re1 is as good a try as any.} Qf7f3 22. Qh4e7 {An obvious mistake, but the game is lost anyway.} Qf3xg3 {0-1.}
I plan to resume weekly (or close to it) service of this blog, so I’ll leave you with the gospel of greenpawn, in the comments of
Blog Post 132:
Best,
Orion
Discussion Thread:
Thread 177764